Understanding Schemas in OpenAPI 3.0
In OpenAPI 3.0, a schema is used to define the data structure of an API's request or response payload. It is a way to describe the expected format and data types of the information being transmitted.
A schema is defined using JSON Schema, which is a standard for describing the structure and validation rules for JSON data. The OpenAPI 3.0 specification includes an extended subset of JSON Schema that provides additional features specific to API documentation, such as the ability to describe response codes and headers.
The schema definition can be included in an OpenAPI document in the components section, where it can be referenced by other parts of the document. A schema can be defined for a request or response body, a request or response header, or a parameter.
Some of the properties that can be defined in a schema include:
type: The data type of the property, such as string, integer, boolean, or array.
format: A format for the data type, such as date-time for a timestamp or email for an email address.
properties: A list of properties and their corresponding schemas for an object.
items: The schema for each item in an array.
required: A list of required properties for an object.
enum: A list of possible values for a property.
By defining schemas in OpenAPI 3.0, API developers can ensure that their APIs are well-documented and that clients can easily understand the expected format and data types of the information being transmitted.
Schemas in Apigit Api design
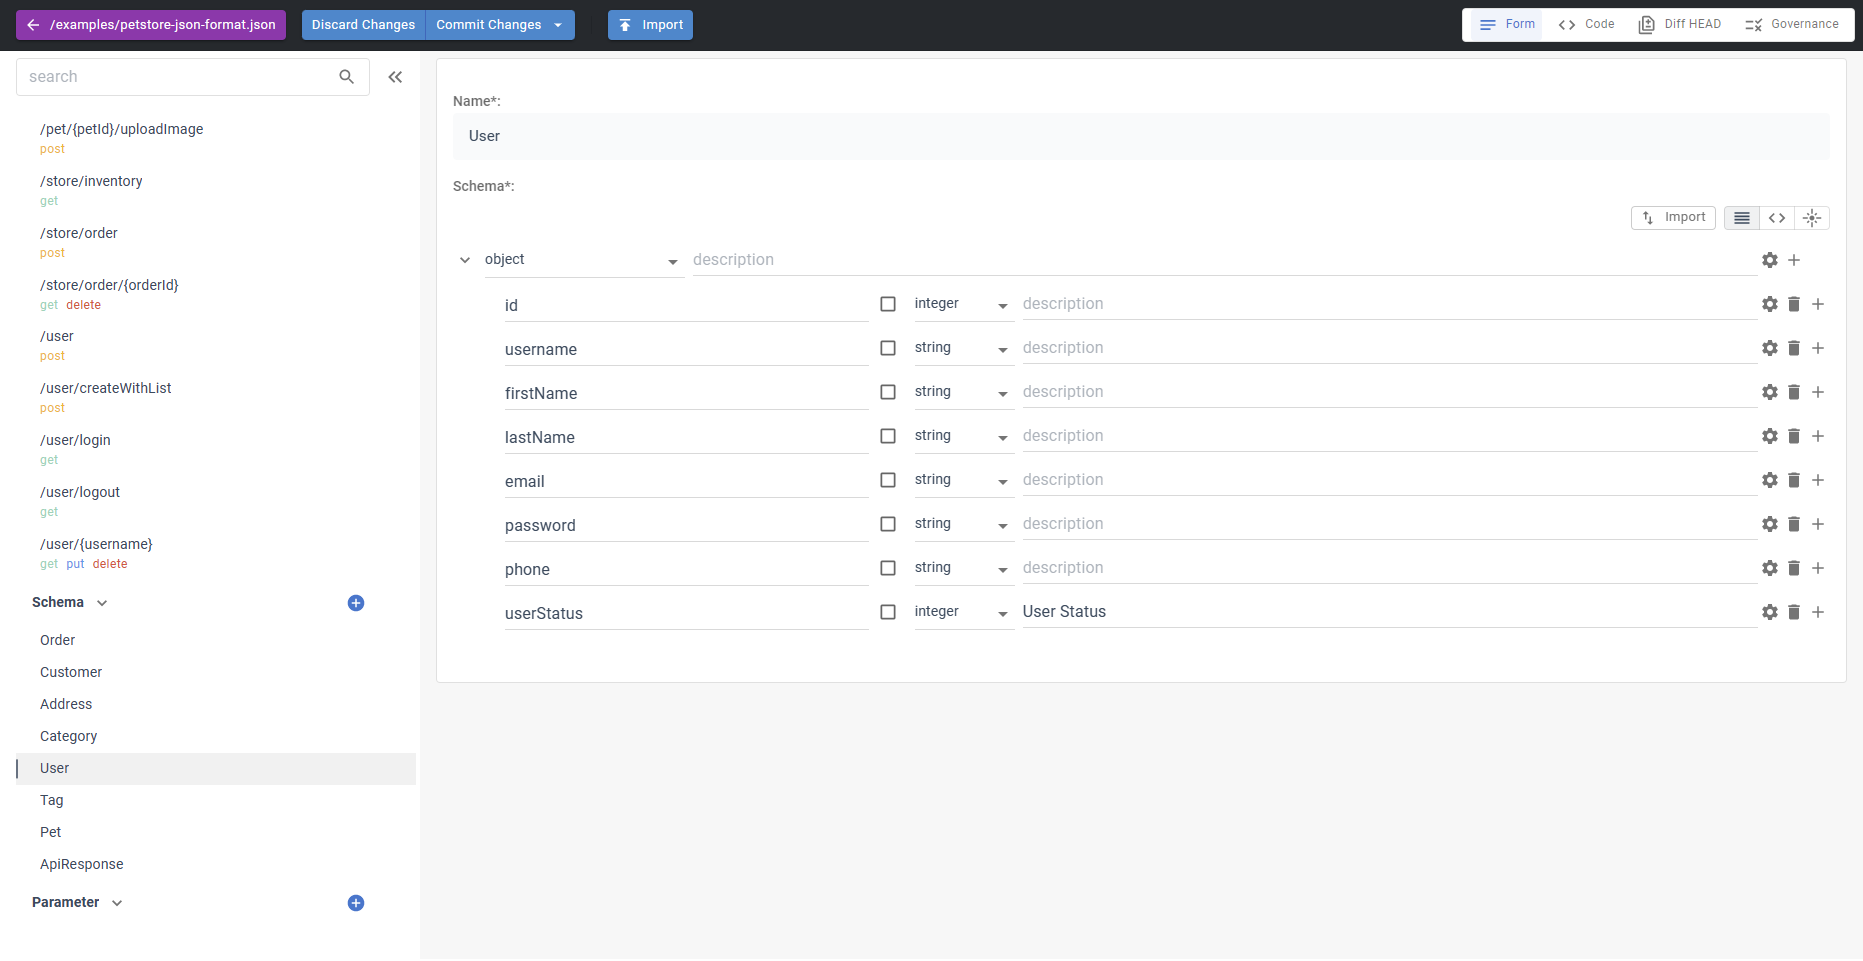
Navigate to API Specification under your repository and choose one sample spec file, in the default view mode, click on the ✏️ icon located in the bottom left-hand corner of the sidebar.
To start, choose a sample schema such as User. Once you have selected a schema, you can switch between the form view and code view. Let's use the User schema as an example, which has six fields to design. While it may seem simple, ChatGPT and Apigit's import tool can help simplify the process even further.
Apigit import ChatGTP's result
You only need to generate a sample data for your object.
{
  "id": 10,
  "username": "theUser",
  "firstName": "John",
  "lastName": "James",
  "email": "john@email.com",
  "password": "12345",
  "phone": "12345",
  "userStatus": 1
}
And then ask ChatGTP to give your the schema data.
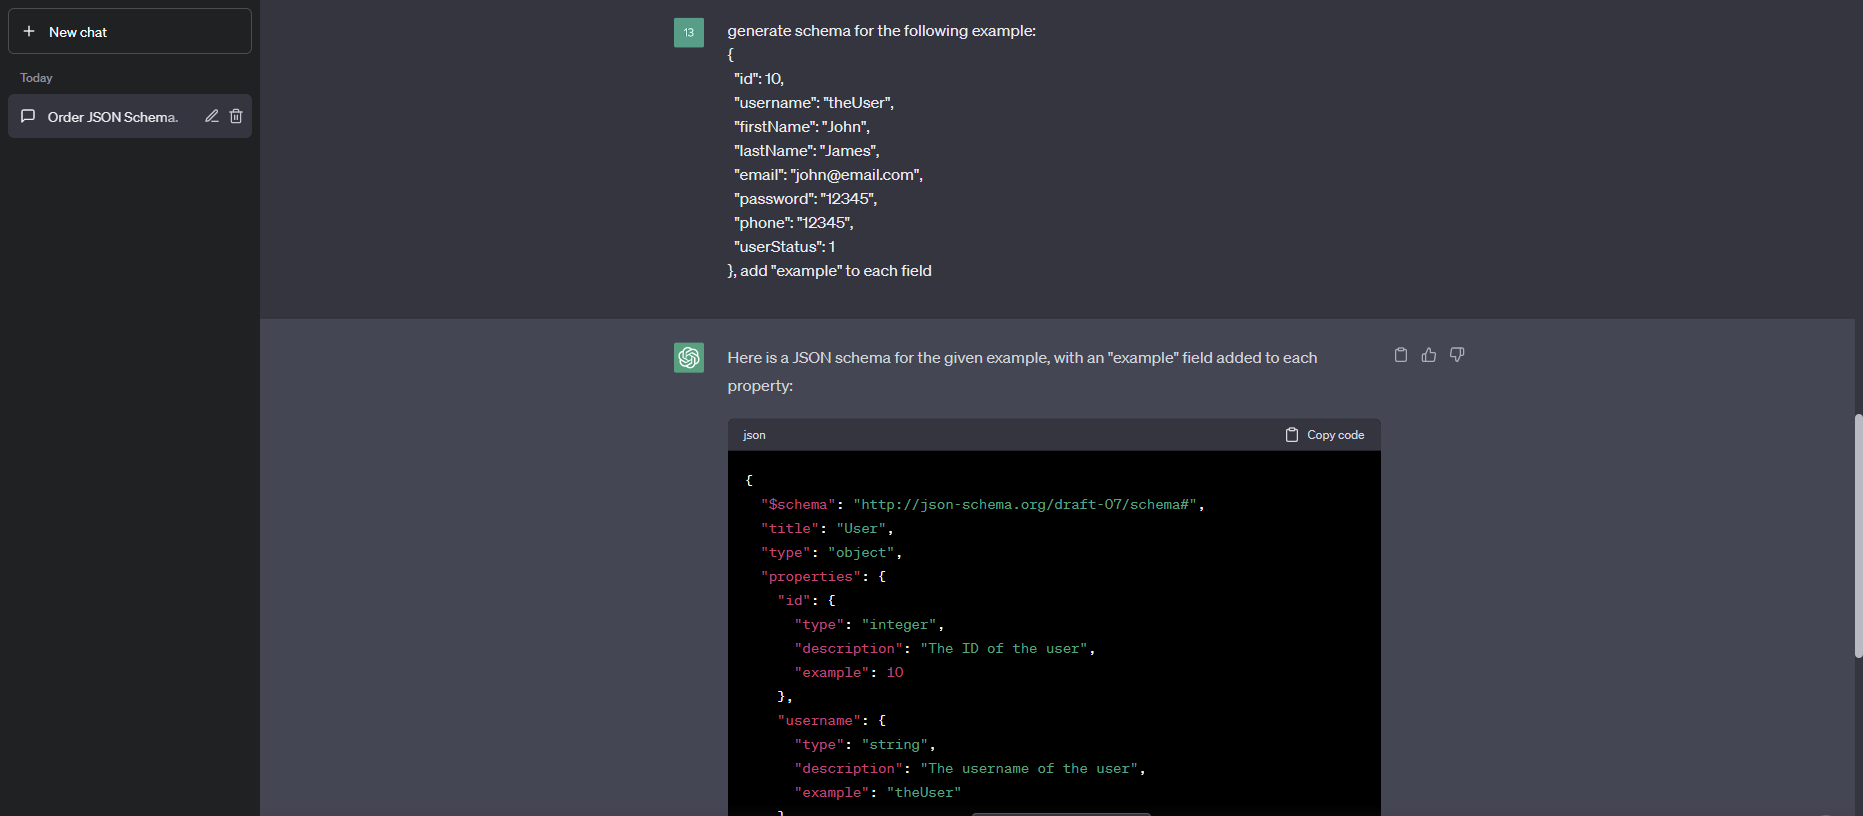 Schemas generated by ChatGTP
What you will get is as below.
{
    "$schema": "http://json-schema.org/draft-07/schema#",
        "title": "User",
        "type": "object",
        "properties": {
        "id": {
            "type": "integer",
                "description": "The ID of the user",
                "example": 10
        },
        "username": {
            "type": "string",
                "description": "The username of the user",
                "example": "theUser"
        },
        "firstName": {
            "type": "string",
                "description": "The first name of the user",
                "example": "John"
        },
        "lastName": {
            "type": "string",
                "description": "The last name of the user",
                "example": "James"
        },
        "email": {
            "type": "string",
                "format": "email",
                "description": "The email address of the user",
                "example": "john@email.com"
        },
        "password": {
            "type": "string",
                "description": "The password of the user",
                "example": "12345"
        },
        "phone": {
            "type": "string",
                "description": "The phone number of the user",
                "example": "12345"
        },
        "userStatus": {
            "type": "integer",
                "description": "The status of the user",
                "example": 1
        }
    },
    "required": ["id", "username", "firstName", "lastName", "email", "password", "phone", "userStatus"]
}
To import the JSON SCHEMA generated by ChatGPT, follow these steps:
- Click on the
importbutton. - Select
JSON SCHEMAfrom the options. - Paste the code generated by ChatGPT into the text field.
- Click
OKorImportto import the schema.
By following these steps, you can ensure that your JSON schema is accurate and meets your needs.
- Review the schema carefully and check for any errors or inconsistencies.
- Make any necessary changes to the schema to correct errors or add missing information.
Related Posts
what are the components of an api
This article explains the different components of a REST API by following a request from end to end. An API client is responsible for assembling and directing an API request to the API server. An API request to a REST API consists of an endpoint, method, parameters, request headers, and a request body. The API server handles authentication, validates input data, retrieves or manipulates data from a database, and returns the appropriate response to the client. An API response typically includes a status code, response headers, and a body. API status codes are used to provide information to the client about the outcome of the request and to help the client understand how to proceed. Response headers and bodies provide additional information and data about the response.
View API documents in different modes
APIGit suports different viewer modes for an API documents. it is easy for you to switch viewers among of them
Secure Your Digital Doorways: Comprehensive API Security Best Practices
Protect your APIs with strong authentication, authorization, data encryption, rate limiting, input validation, and regular security testing to prevent unauthorized access and data breaches.
Ready to get started with APIGIT?
Join thousands of developers and teams who are already using APIGIT to streamline their API development workflow.