Generate Mock Server script automatically
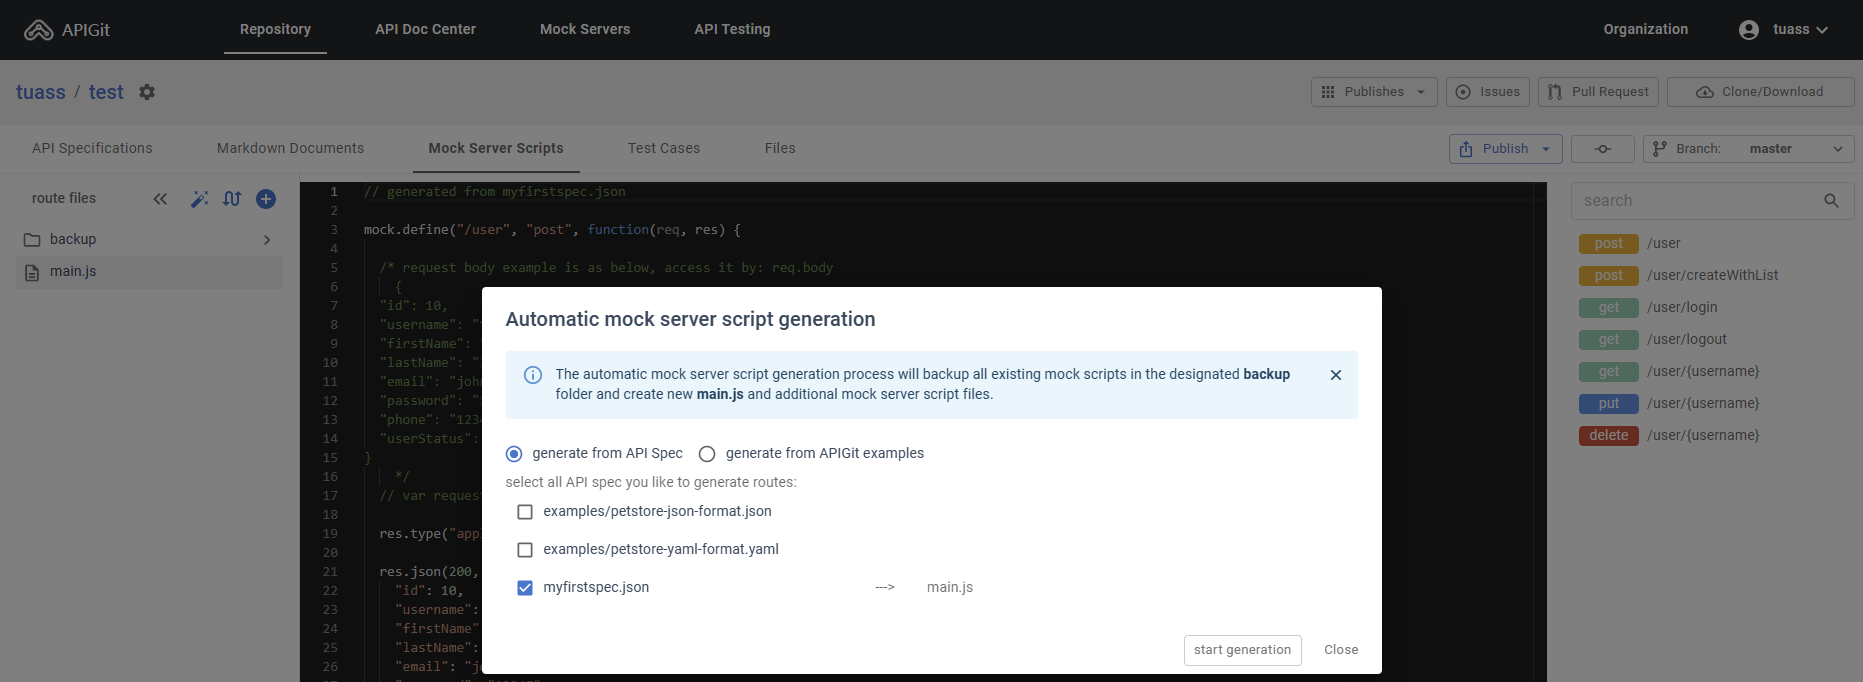
If you have created your own specification within your repository, congratulations! You can now automatically generate the Mock Server. To do so, simply navigate to "Mock Server Scripts" within your repository and click on the arrow icon at the top of the sidebar. This will display the following set of instructions:
 Generate Mock Server script from API spec
Once you have clicked on the arrow icon in the previous step, you will see that the entire route script is generated for you.
 Mock Server script according to API spec
How simple is the mock server script?
Thanks to the powerful automatic Mock Server tool, you will receive several scripts related to the API specification. However, it is important to note that only a few lines of code are required to deploy the Mock Server.
//this script should be in main.js
mock.define("/", "GET", function (req, res) {
    res.send(200, "welcome to apigit mock server");
});
Within the "main.js" file, you will find a variety of route functions that are related to the API specification. You are free to define additional functions within this file for the purpose of further testing.
What is Dynamic MockServer?
With Dynamic MockServer, developers can create multiple scenarios for different endpoints, each with different response data, headers, and status codes. This allows developers to test their applications in various scenarios and conditions, ensuring that they work as expected in different situations.
Deploying a Dynamic Mock Server on the Apigit platform is a straightforward process. By defining an array list and adding, updating, or searching within it, you can receive responses based on the requests that you have sent previously.
//all routes should be defined in main.js)
// global state
state.users = state.users || []
// create a user
mock.define("/user", "POST", function (req, res) {
    var user = req.body;
	if (user.username === "") {
		res.send(405, "Invalid input");
		return;
	}
	user.id = uniqueId(); // generate uniqueID for the new user
	state.users.push(user);

	res.send(200, user);
});

// find user by name
mock.define("/user/{username}", "GET", function (req, res) {
    var user = null;
	for (var i = 0; i < state.users.length; i++) {
		if (state.users[i].username == req.params.username) {
			user = state.users[i];
			break;
		}
	}
	if (user === null) {
		res.send(404, "User not found");
		return;
	}
	res.send(200, user);
});
What a software engineer would like?
To ensure that your script remains organized and easy to understand, it is recommended that you define all routes within the "main.js" file. However, if you prefer to keep your code more modular, you can create a new route file by clicking on the "+" icon and adding your callback function to the new file. The file structure will appear as follows:
//main.js
var pet = require("./routes/pet.js")
// define the routes callback in seperated files
// pet
mock.define("/pet", "PUT", pet.updatePet); // update an existing pet
And define the callback function in another file.
//./routes/pet.js
// global state
state.pets = state.pets || []

exports.updatePet = function (req, res) {
    var pets = state.pets || [];
    var pet = req.body;
    var i = 0;

    for (i = 0; i < pets.length; i++) {
        if (pets[i].id == pet.id) {
            pets[i] = pet;
            state.pets = pets;
            break;
        }
    }

    if (i === pets.length) { // menas not found the pet
        res.send(404, 'Pet not found');
        return;
    }

    res.send(200, pet);
};
For full example, you can visit Github.
Keep exploring
To use the Mock Server that you have created, you must first publish the script. Once the script has been published, you can find the server address within the "Mock Servers" section. You can keep exploring the mock server script by visiting Automatic generation of Ready-to-Use Mockservers or Mock Server API Definition.
Related Posts
Using Mock Servers Throughout the API Lifecycle
Mock servers accelerate API development by enabling parallel work between frontend and backend teams, facilitating testing, and providing realistic responses for development and demonstration purposes.
mockserver migration guide
This migration guide helps teams transition to APIGit's advanced mock server capabilities, ensuring continuous API testing and development during the migration process.
Ready to get started with APIGIT?
Join thousands of developers and teams who are already using APIGIT to streamline their API development workflow.