At Apigit, we strive to democratize APIs and empower users to utilize and construct APIs with the Apigit API Platform to enable a thriving API-first world. With over tens of thousands of users, we continue to expand our reach and provide access to the best opportunities Apigit has to offer – from newcomers to advanced users.
To access any of the specific features listed below, you must first create an Apigit account and sign in. Apigit can be accessed directly from your preferred browser.
After logging in, you can explore these five exciting features to get started with Apigit.
1. Create a repository
After creating your Apigit account, you can explore the platform's various features, including creating a repository. A repository is a space where you can store your code and collaborate with others.
To create a repository, navigate to the top of your Apigit dashboard and click on the + sign. From the drop-down menu, select New repository. On the next page, you will be prompted to enter a name and optional description for your repository. After providing this information, click on the "Create repository" button to finalize the process.
Congratulations, you have successfully created your first repository on Apigit! You can now start adding files, collaborating with others, and utilizing the platform's many other features.
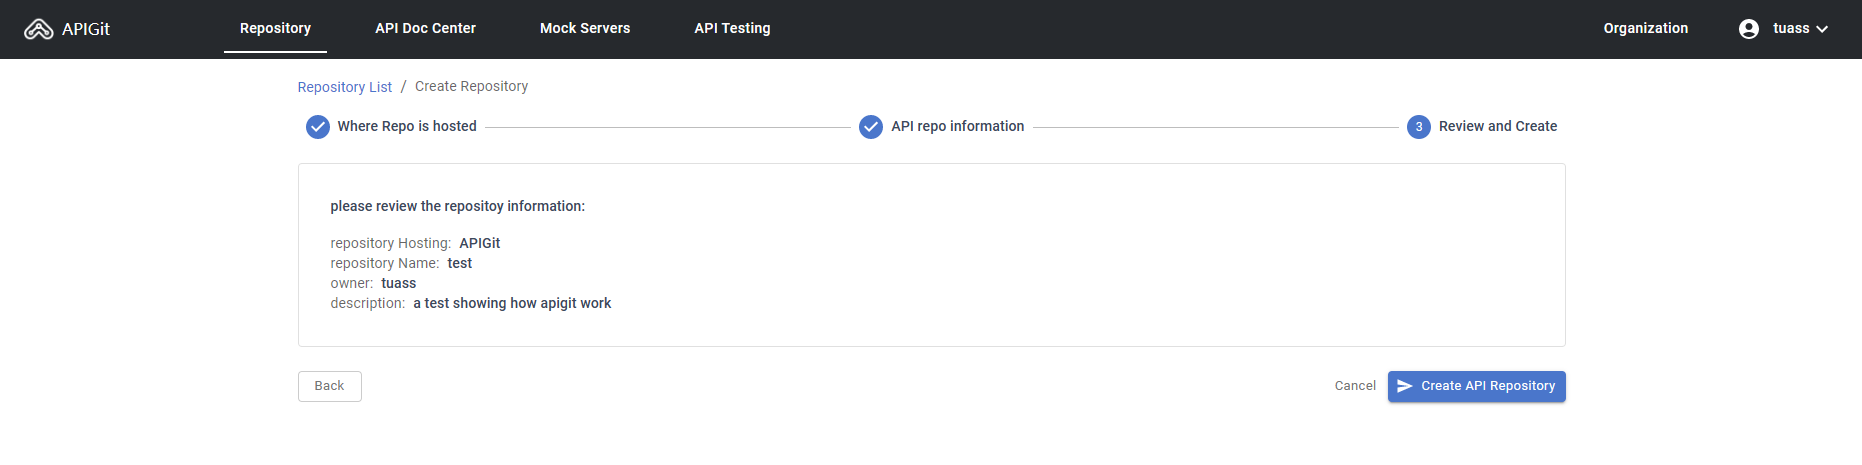 First step: Create a repository
2. Add an api spec
To add an API specification to your Apigit dashboard, click on the + sign located in the top left corner. Input a pathname, such as test/myfirst.json, along with other relevant information like the title and version.
Before adding a new API specification, you may want to explore the example provided in your repository. By clicking on the 🪄 icon in the left sidebar, you can switch to a different viewer. For instance, you can select the petstore-json-format.json file from the examples folder and switch the viewer to code to view the JSON format code for the example specification.
To edit your API specification, hover your mouse over the file and click on the ⋮ icon at the end of the file or click on the ✏️ icon located at the bottom left of the dashboard. You can then copy the JSON code from the example and use it to create your own specification. Here's an example of what your first API specification could look like.
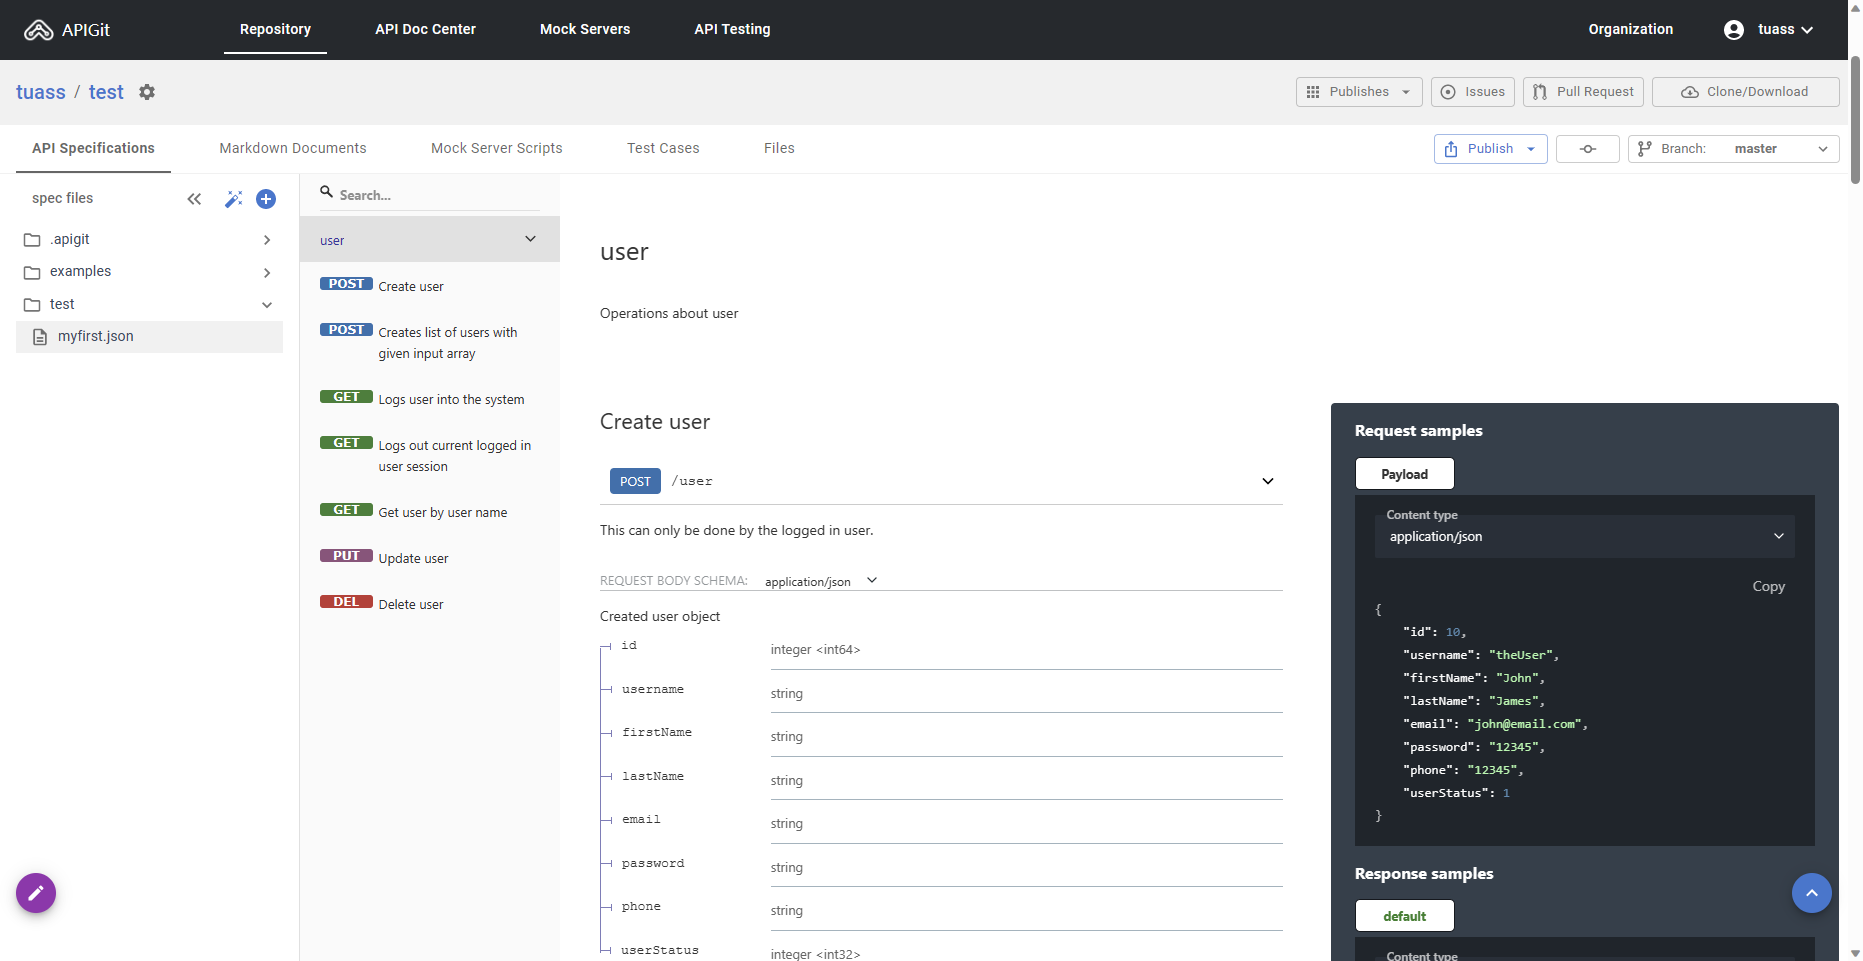 Second step: Add an api spec
3. Create and publish a mock server
Mock servers are often used in API development to simulate the behavior of an API before it is fully implemented. Developers can use mock servers to test their code and ensure that it is working as expected, without having to wait for the API to be completed or having to make requests to a real server.
Deploying a mock server in Apigit is a simple process. First, navigate to your repository and click on the Mock Server Script button. Once you have completed your server script, publish the server. You can then find the server URL in the Mock Servers page located in the top menu.
 Third step: Create and publish a mock server
4. Create and publish an API Testing
API testing is the process of verifying that APIs conform to their specifications, can handle different types of inputs and outputs, and gracefully handle errors and exceptions. API testing can be conducted manually or with automated tools that simulate requests and responses to the API.
To begin API testing on Apigit, click on the Test Cases button located under your repository. Here, you will find API test examples. Create your own test case and replace the baseurl with the mock server URL generated in step 3.
Once you have published your API test case, you can find and run it on the API Testing page. You can access this page by clicking on the API Testing button in the top menu.
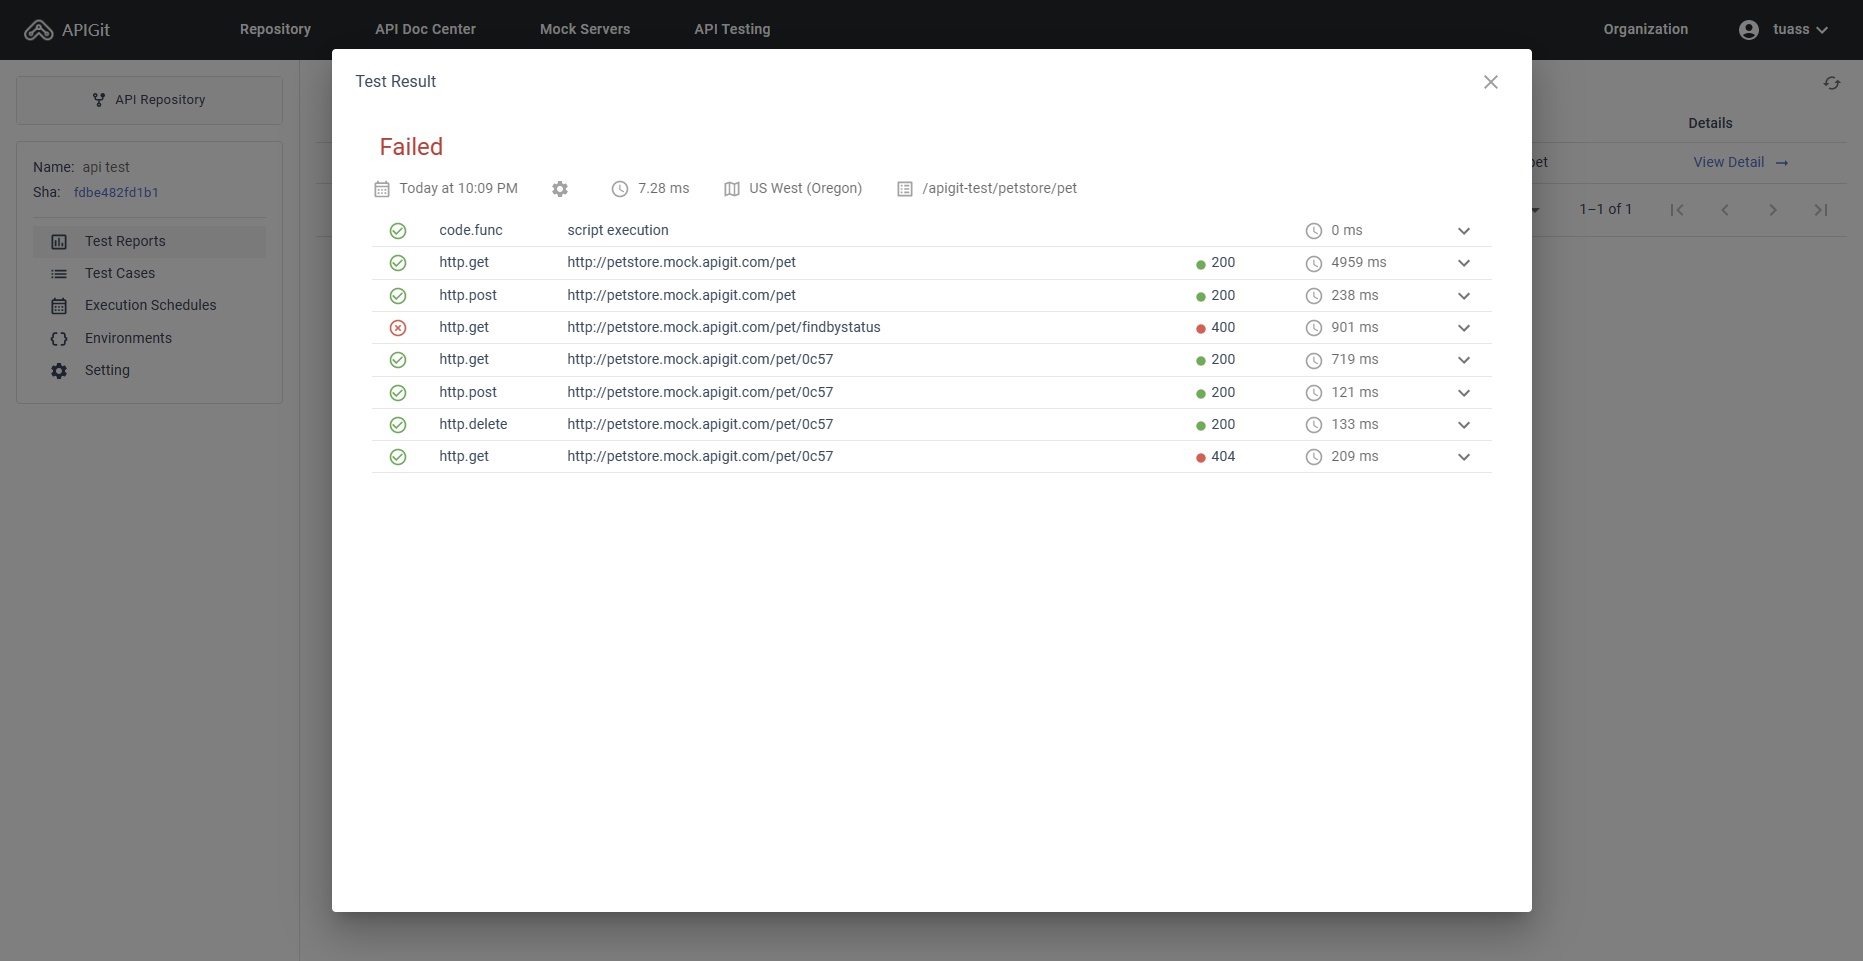 Fourth step: Create and publish an API Testing
5. Share your work
Apigit is a popular API collaboration platform that enables easy sharing of work. Whether you're working on a small project with a single friend or are part of an enterprise company with hundreds of developers actively working on a public API, you have control over what is visible and to whom.
If you've created something that you believe the world should see, you can publish it to the Apigit API network. This will allow Apigit users worldwide to access your collection.
Keep exploring—to the next level
Now that you've mastered some of the basics, take some time to explore and discover more useful functions on Apigit. For instance, did you know that you can design an API test case that depends on the result of another API? Explore this and many other helpful tools available on the platform.
Related Posts
what are the components of an api
This article explains the different components of a REST API by following a request from end to end. An API client is responsible for assembling and directing an API request to the API server. An API request to a REST API consists of an endpoint, method, parameters, request headers, and a request body. The API server handles authentication, validates input data, retrieves or manipulates data from a database, and returns the appropriate response to the client. An API response typically includes a status code, response headers, and a body. API status codes are used to provide information to the client about the outcome of the request and to help the client understand how to proceed. Response headers and bodies provide additional information and data about the response.
View API documents in different modes
APIGit suports different viewer modes for an API documents. it is easy for you to switch viewers among of them
Secure Your Digital Doorways: Comprehensive API Security Best Practices
Protect your APIs with strong authentication, authorization, data encryption, rate limiting, input validation, and regular security testing to prevent unauthorized access and data breaches.
Ready to get started with APIGIT?
Join thousands of developers and teams who are already using APIGIT to streamline their API development workflow.