When publishing API specifications and documentation from Git repositories, creating a well-structured, user-friendly navigation experience is crucial for helping your audience find information quickly and efficiently. This comprehensive guide explores how to leverage APIGIT's navigation customization capabilities to transform your documentation from a simple file listing into a professionally organized, intuitive resource.
Why Navigation Customization Matters
By default, APIGIT automatically generates navigation by listing all API specification files and Markdown documents in alphabetical order as a sidebar tree. While functional, this approach often fails to provide the optimal user experience. Custom navigation allows you to:
- Control Content Visibility: Specify which files should be accessible and which should remain hidden
- Create Logical Organization: Structure content into meaningful hierarchies that match user workflows
- Enhance User Experience: Design intuitive navigation paths that reduce cognitive load
- Add External Resources: Include links to external documentation, repositories, or related resources
- Apply Visual Enhancement: Use icons and themes to create a more engaging interface
The Navigation Configuration File: apigit.json
The foundation of navigation customization in APIGIT is the apigit.json file, which must be placed in your repository root. This configuration file serves as the blueprint for your documentation site's structure, theme, and navigation behavior.
Basic Structure
{
  "theme": "sequoia",
  "nav": [
    {
      "name": "Getting Started",
      "slug": "getting-started",
      "icon": "sparkle",
      "children": [
        {
          "name": "Introduction",
          "slug": "introduction",
          "file": "docs/introduction.md",
          "icon": "book-open"
        }
      ]
    }
  ]
}
Theme Configuration
APIGIT supports two distinct documentation themes, each offering a different user experience:
Clover Theme
A classic documentation theme featuring a three-part layout with:
- Top navigation header
- Sidebar navigation
- Main content area
This theme is ideal for traditional documentation sites that require top-level navigation menus.
Sequoia Theme
A modern, streamlined theme with a two-part layout consisting of:
- Sidebar navigation
- Main content area
This theme provides a cleaner, more focused reading experience perfect for API documentation and technical guides.
Setting Themes
Global Theme Configuration: Set a default theme for all API documents by navigating to Publish Center → API Documents → Settings and selecting your preferred theme.
Version-Specific Theme Configuration: Override the global default by specifying the theme in your apigit.json file:
{
  "theme": "sequoia"
}
Navigation Entry Types and Structure
The navigation system supports four primary entry types, each serving different organizational purposes:
File Entry
Links directly to a document or API specification within your repository:
{
  "name": "Installation Guide",
  "slug": "installation-guide",
  "file": "docs/installation.md",
  "icon": "download"
}
External Link Entry
Creates links to external resources:
{
  "name": "GitHub Repository",
  "slug": "github",
  "url": "https://github.com/your-org/your-repo",
  "icon": "github"
}
Parent Entry with Children
Creates hierarchical navigation with nested items:
{
  "name": "User Management",
  "slug": "user-management",
  "icon": "users",
  "children": [
    {
      "name": "User Registration",
      "slug": "user-registration",
      "file": "features/user-management/registration.md"
    },
    {
      "name": "Authentication",
      "slug": "authentication",
      "file": "features/user-management/auth.md"
    }
  ]
}
Group Entry (Top-Level Only)
Creates grouped top-level navigation for complex documentation structures:
{
  "name": "Features",
  "slug": "features",
  "group": [
    {
      "name": "User Management",
      "slug": "user-management",
      "children": [...]
    },
    {
      "name": "E-Commerce",
      "slug": "e-commerce",
      "children": [...]
    }
  ]
}
Field Reference
Required Fields
- name: The display name for the navigation or sidebar entry
Optional Fields
- slug: URL-friendly identifier (auto-generated from name if omitted)
- icon: Visual icon from Lucide or Font Awesome icon sets
- file: File path to repository document or API specification
- url: External URL for navigation entry
- children: Array of nested entries for hierarchical navigation
- group: Array of entries for grouped top-level navigation (top-level only)
Advanced Navigation Patterns
Multi-Level API Documentation Structure
{
  "nav": [
    {
      "name": "Getting Started",
      "slug": "getting-started",
      "icon": "rocket",
      "children": [
        {
          "name": "Quick Start",
          "slug": "quick-start",
          "file": "docs/quick-start.md"
        },
        {
          "name": "Authentication",
          "slug": "auth-overview",
          "file": "docs/authentication-overview.md"
        }
      ]
    },
    {
      "name": "API Reference",
      "slug": "api-reference",
      "icon": "code",
      "children": [
        {
          "name": "Users API",
          "slug": "users-api",
          "children": [
            {
              "name": "Get User",
              "slug": "get-user",
              "file": "api/users/get-user.json"
            },
            {
              "name": "Create User",
              "slug": "create-user",
              "file": "api/users/create-user.json"
            },
            {
              "name": "Update User",
              "slug": "update-user",
              "file": "api/users/update-user.json"
            }
          ]
        },
        {
          "name": "Orders API",
          "slug": "orders-api",
          "children": [
            {
              "name": "List Orders",
              "slug": "list-orders",
              "file": "api/orders/list-orders.json"
            },
            {
              "name": "Create Order",
              "slug": "create-order",
              "file": "api/orders/create-order.json"
            }
          ]
        }
      ]
    },
    {
      "name": "SDKs & Libraries",
      "slug": "sdks",
      "icon": "package",
      "children": [
        {
          "name": "JavaScript SDK",
          "slug": "javascript-sdk",
          "file": "sdk/javascript.md"
        },
        {
          "name": "Python SDK",
          "slug": "python-sdk",
          "file": "sdk/python.md"
        },
        {
          "name": "Go SDK",
          "slug": "go-sdk",
          "file": "sdk/go.md"
        }
      ]
    },
    {
      "name": "Support",
      "slug": "support",
      "icon": "help-circle",
      "children": [
        {
          "name": "FAQ",
          "slug": "faq",
          "file": "docs/faq.md"
        },
        {
          "name": "Contact Support",
          "slug": "contact",
          "url": "https://support.yourcompany.com"
        },
        {
          "name": "Community Forum",
          "slug": "forum",
          "url": "https://community.yourcompany.com"
        }
      ]
    }
  ]
}
Enhanced Markdown Capabilities
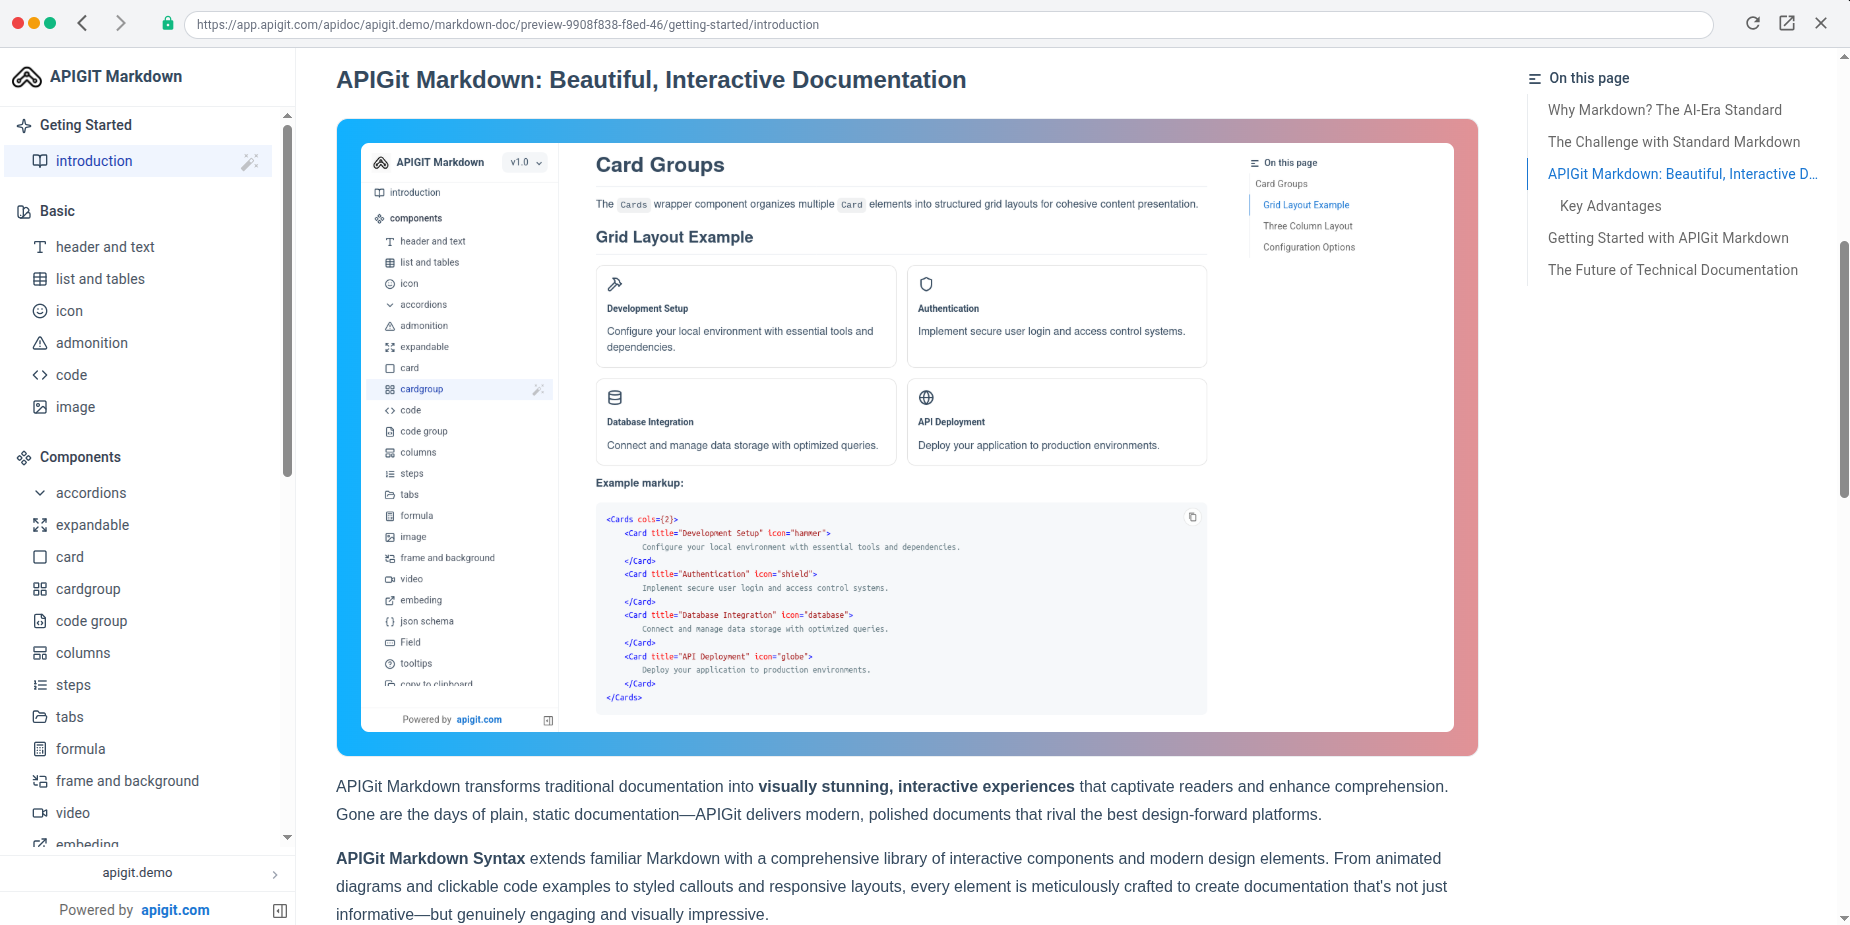
APIGIT extends standard Markdown with dozens of advanced, interactive components that enable you to create comprehensive, engaging documentation. The platform includes an interactive markdown editor with real-time preview capabilities, allowing you to build sophisticated documentation without requiring deep markdown expertise.
Built-in Components Include:
- Interactive Elements: Tabs, accordions, expandable content
- Visual Components: Cards, card groups, columns, frames
- Code Features: Code groups, syntax highlighting, copy-to-clipboard
- Data Visualization: Mermaid diagrams, charts, mathematical formulas
- Content Organization: Steps, admonitions, tooltips
- Media Support: Video embedding, image handling
- Advanced Features: JSON schema rendering, change tracking
For a complete component reference and interactive examples, visit https://markdown.apigit.com.
Creating and Managing Navigation Files
Initial Creation
- Click the "+" icon in your project interface
- Navigate to the "Navigation (apigit.json)" tab
- Click the "Create" button
This process automatically generates an initial apigit.json structure based on your repository's current file hierarchy, providing a solid foundation for customization.
Editing Existing Navigation
- Select the
apigit.jsonfile from your repository file list - Use the built-in editor to modify navigation entries
- Preview changes in real-time as you edit
- Utilize the auto-generation button to recreate structure based on current repository files
Best Practices for Navigation Design
Logical Hierarchy
Organize content to match user workflows and information-seeking patterns. Group related concepts together and create clear paths from general to specific information.
Consistent Naming
Use clear, descriptive names that immediately convey the content's purpose. Maintain consistent naming conventions throughout your navigation structure.
Strategic Icon Usage
Leverage icons to provide visual cues and improve navigation scanning. Choose icons that reinforce the content type or section purpose.
Balanced Depth
Avoid overly deep navigation hierarchies that require multiple clicks to reach content. Generally, limit nesting to 2-3 levels for optimal usability.
External Link Integration
Strategically include external links to related resources, support channels, or complementary documentation to create a comprehensive user experience.
Default Behavior and Migration
When no apigit.json file exists, APIGIT automatically generates a basic navigation structure by listing all API specifications and Markdown documents alphabetically. While this provides immediate functionality, migrating to a custom navigation configuration offers significant benefits:
- Improved content discoverability
- Better user engagement
- Professional appearance
- Enhanced information architecture
- Reduced user confusion
Conclusion
Navigation customization in APIGIT transforms your documentation from a simple file repository into a professional, user-centric resource. By leveraging the apigit.json configuration file, theme options, and advanced markdown components, you can create documentation experiences that not only inform but engage your audience.
The combination of flexible navigation structures, modern themes, and interactive content components provides the foundation for documentation that scales with your project's complexity while maintaining clarity and usability. Whether you're documenting a simple API or a comprehensive platform, APIGIT's navigation customization capabilities ensure your documentation serves as an effective bridge between your technology and your users.
Start with the auto-generated navigation structure, then iterate and refine based on user feedback and analytics to create documentation that truly serves your audience's needs. The investment in thoughtful navigation design pays dividends in user satisfaction, reduced support burden, and improved developer experience.
Related Posts
What Are the Components of an API?
This article explains the different components of a REST API by following a request from end to end. An API client is responsible for assembling and directing an API request to the API server. An API request to a REST API consists of an endpoint, method, parameters, request headers, and a request body. The API server handles authentication, validates input data, retrieves or manipulates data from a database, and returns the appropriate response to the client. An API response typically includes a status code, response headers, and a body. API status codes are used to provide information to the client about the outcome of the request and to help the client understand how to proceed. Response headers and bodies provide additional information and data about the response.
View API Documents in Different Modes
APIGit suports different viewer modes for an API documents. it is easy for you to switch viewers among of them
Secure Your Digital Doorways: Comprehensive API Security Best Practices
Protect your APIs with strong authentication, authorization, data encryption, rate limiting, input validation, and regular security testing to prevent unauthorized access and data breaches.
Ready to get started with APIGIT?
Join thousands of developers and teams who are already using APIGIT to streamline their API development workflow.