How do I test my api?
Before learning about API testing, I used to create an API by filling in the path and parameters, and then send a request to check the results. As a QA, I would write a test report. However, since each API is independent, I had to initialize the testing environment each time before starting a new test.
With API testing using tools like Apitgit, I just need to provide a simple code, which generates the testing report automatically. Additionally, we can save the response and use it in another request to test the real logic of the system. This saves time and effort in the testing process.
Start an api test
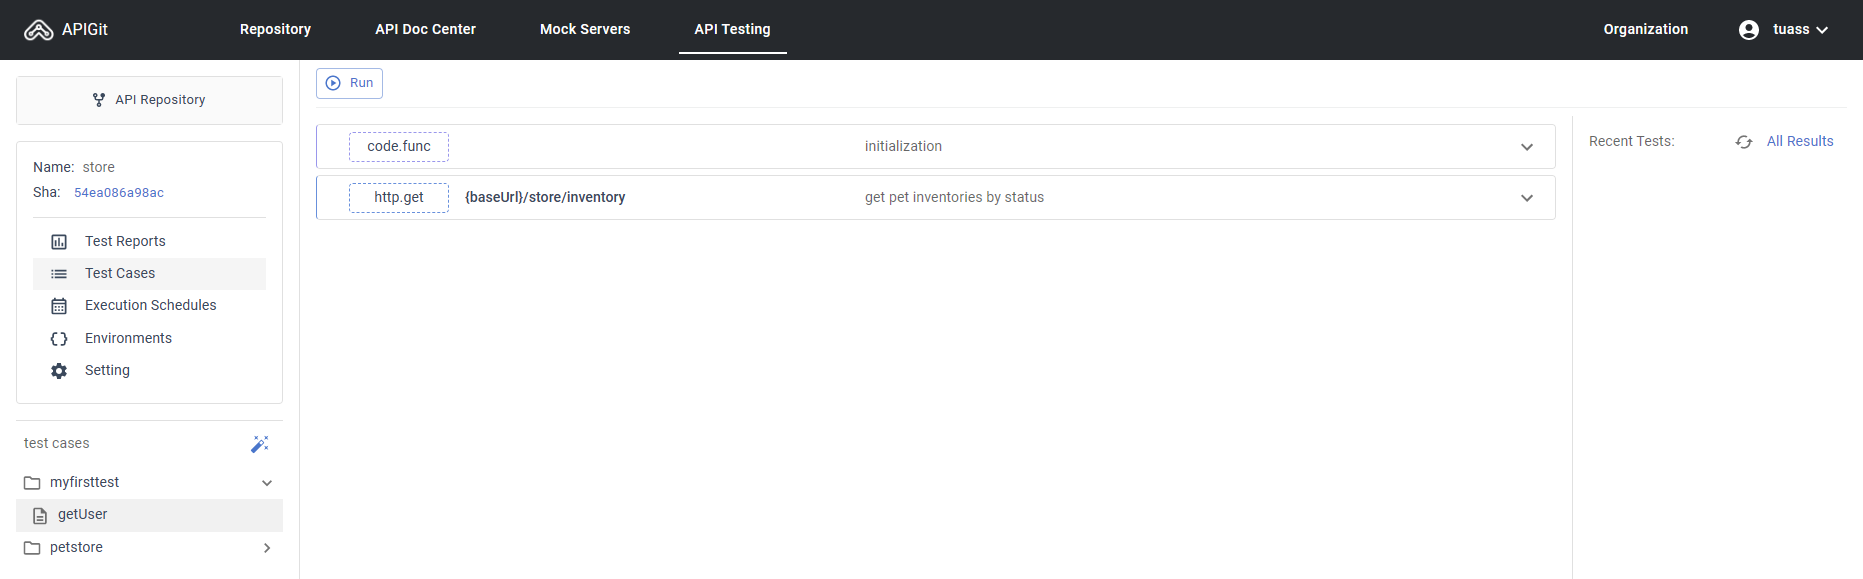
To start API testing, navigate to the Test Cases section in your repository and click the + button. Fill in the path name with a string such as myfirsttest/getUser. In this example, myfirstname is the folder name, and getUser is the test case name. If you are adding another test case, you can choose the folder you want without having to fill in the folder name again. While in the example we put several test cases in one file, you can make it simpler by organizing each test case in a separate file.
 Create an api testing folder and testcase file
The structure of a testcase file
Sample code in file "myfirsttest/addPet".
[
    {
        "type": "code",
        "description": "initialization",
        "parameters": {
            "code": "var baseUrl = env.get(\"baseUrl\");\nif (baseUrl == null) {\n    state.baseUrl = \"http://petstore.mock.apigit.com\";\n    //env.set(\"baseUrl\", \"http://petstore.mock.apigit.com\")\n}"
        }
    },
  {
    "type": "http",
    "description": "place an order for a pet",
    "parameters": {
      "method": "post",
      "url": "{baseUrl}/store/order",
      "query": [],
      "auth": {
        "type": "none"
      },
      "header": [
        {
          "name": "content-type",
          "value": "application/json",
          "enabled": true
        }
      ],
      "body": {
        "type": "application/json",
        "data": "{\n  \"id\": 11,\n  \"petId\": 198772,\n  \"quantity\": 7,\n  \"shipDate\": \"2023-01-14T19:25:54.211Z\",\n  \"status\": \"approved\",\n  \"complete\": true\n}"
      },
      "postTest": "if (!res || res.status !== 200) {\n    failed(\"place purchae order failed\")\n    return;\n}\n\nvar order = res.data;\nstate.orderId = order.id;"
    }
  }
]
This is an amazing design. The code is structured in JSON format. It is a JSON array that contains several JSON objects. In software engineering terms, this structure resembles a function. The test case file name represents the function name, and each JSON object represents a line of executable code. The file is compiled as follows:
exports.addPet = function () {
    //first JSON object
    var baseUrl = env.get("baseUrl");if (baseUrl == null) {state.baseUrl = "http://petstore.mock.apigit.com";}
    //second JSON object
    var res = post(body);if (!res || res.status !== 200) {failed("place purchae order failed");return;}var order = res.data;state.orderId = order.id;
};
For more information, you can visit Api Testing Doc. It is an amazing testing tool that can be used not only to test APIs with mock servers but also to test real servers.
Keep exploring
To deploy your test cases, simply publish your files. After that, you can run your tests and generate the test report.
 Run your testcases
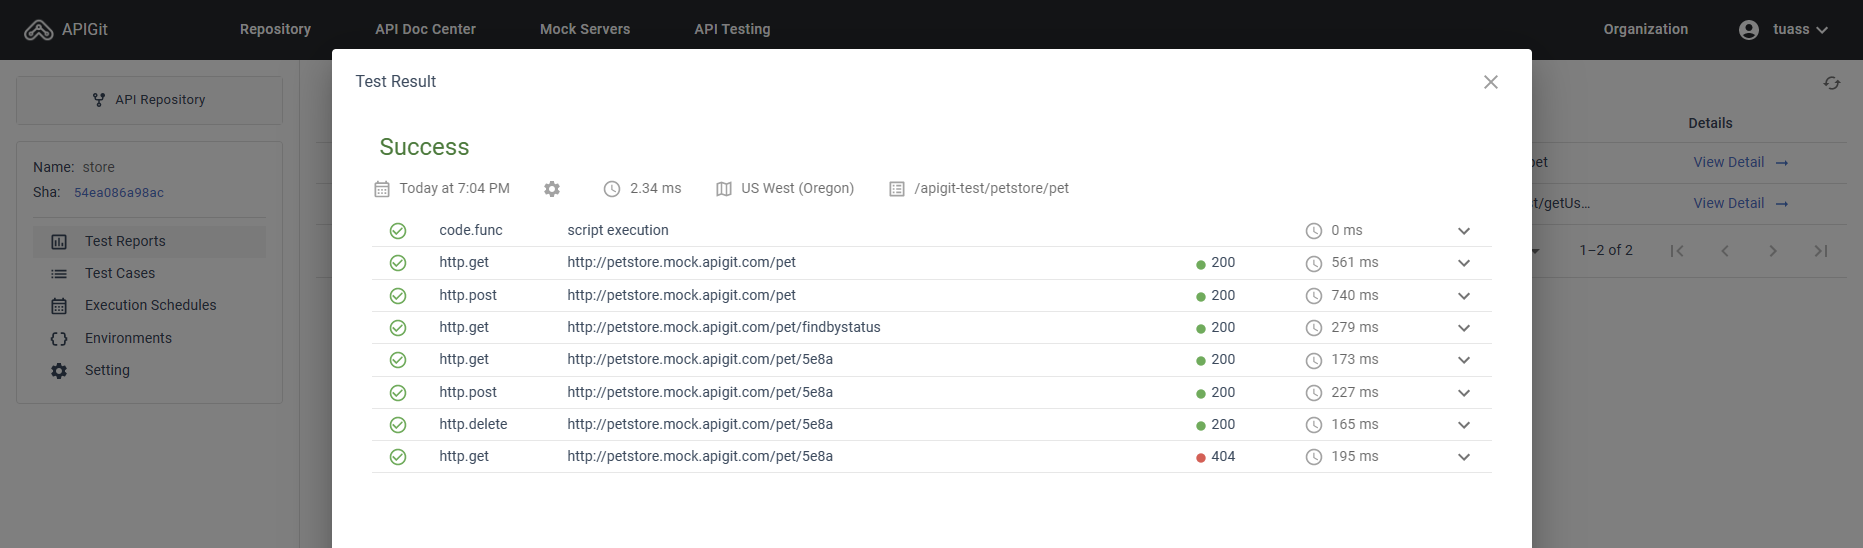 Get your test report
Related Posts
expressjs powered mockserver
Express.js powered mock servers provide flexible, customizable API simulations with dynamic responses, advanced routing, and middleware support for comprehensive testing and development environments.
explorer api testing environment
APIGit's testing environment provides comprehensive tools for validating API functionality, performance, and security across different deployment stages and configurations.
automatic mockserver generation
Automatic mock server generation accelerates API development by instantly creating functional API simulations from OpenAPI specifications, complete with realistic example responses.
Ready to get started with APIGIT?
Join thousands of developers and teams who are already using APIGIT to streamline their API development workflow.